Showing posts with label I love produce. Show all posts

Sunday, November 13, 2011

Roasted Butternut Squash with Corn & Cranberries


A few years ago, when I was still eating meat, I used to go to Nando's Peri Peri, which specializes in Portguese roast chicken.  They also have a number of sides, including a roasted butternut squash dish I enjoyed so much that I learned to replicate it myself.  While I no longer eat chicken, I still love this squash combo.  I now make it regularly for Thanksgiving and fall family meals, as well as for my office's annual Thanksgiving Potluck, which will take place this Tuesday.

The health benefits of butternut squash are numerous.  It's a great source of fiber, Vitamin A, B-complex vitamins and minerals like iron and zinc.  Now that it's fall, you'll likely see whole butternut squash everywhere.  If you do decide to go with whole squash, make sure you have a very, very good knife, as I once wrecked an entire set of cheap knives trying to deconstruct one.  Here's a handy tutorial on how to peel and chop the butternut.

I, however, opt to use fresh-cut squash chunks, which saves me a lot of prep time (and sanity).  The chunks are still fairly large, so I do chop them in smaller pieces.  For a large crowd like my 20+ person office potluck, I used two packages.

Corn zipper in action.
I also prefer to use fresh corn - my local market still has ears available.  If you don't have access to fresh corn, frozen is an ok substitute, but defrost it first. Try to avoid using canned - the texture will be too soft.  If you're using fresh corn, using a corn-zipper is a safe and quick way to get the kernels off.  As I've mentioned before, it's a great investment for your kitchen!  For this amount, I used two ears.

I then finely chopped a medium red onion and added it in, along with a generous handful or two of dried sweetened cranberries and a handful of chopped fresh cilantro.  Make sure to use the fresh herbs here - dried won't work.

I then combine everything in a large mixing bowl and stir in a generous amount of olive oil, and season it with kosher salt and freshly ground black pepper.  Put it in glass baking dishes on a single layer (making enough for 20 meant two dishes) and let it roast for 30 minutes at 400, stirring occasionally.

Thursday, November 10, 2011

Adventures in Kabocha Squash

Now that we are in the midst of Fall, all the local markets have an abundance of squash to choose from.  There's the familiar butternut and acorn, but also carnival, hubbard, turban and other lesser known varieties.

This means, of course, that I finally was able to procure kabocha squash.  I wrote in a previous blog that I had a delicious preparation of kabocha squash at SEI back in March and that I've been stalking it ever since.  Now that squash is available in abundance, I was able to procure one.  Granted, once I bought it, I didn't have the foggiest idea what to do with it.

So, I did some research.  Kabocha is also known as Japanese Pumpkin, likely because of it's pumpkin-like shape and the fact that it is primarily grown in Japan.  It is also a popular component of vegetable tempura, which means many of us have probably had it without realizing it.  Kabocha, like many bright orange vegetables, is rich in beta carotene, and also a nice source of iron, vitamin C and potassium. 

I did some googling to see how kabocha is often prepared.  I saw a lot of soups with thyme, and I figured I could get the same flavors by cubing and roasting the kabocha and seasoning it with fresh herbs.  This was an excellent plan, but I didn't take one thing into consideration.  The kabocha is the Fort Knox of vegetables.  I even had trouble hacking through it with my trusty Wusthoff.  So, after I finally got it in half, I scraped out the seeds, put it face down on a baking sheet sprayed with cooking spray and roasted the kabocha halves in the oven at 400 for 40 minutes.

I took the kabocha out of the oven to cool.  In the meantime, I minced a shallot, prepped the fresh thyme and shredded some kale.  When the kabocha was cool enough to handle, I began cutting chunks of it from the shells.  It had an almost crumbly texture - possibly, I let it cook for too long, but it had a nice flavor.

I then put the shallots to work in a gob of soy-free Earth Balance, and then added the kabocha chunks, thyme, salt and pepper, kale and fresh parsley.  I then added in some leftover freekeh from last night.  It looked a little dry, so I added a splash of wine to moisten things up. 

The result was a nice, filling cold-weather meal.  The kabocha was similar to butternut squash, but nuttier and creamier (the latter creaminess may have come from the large hunk of faux butter I cooked it in).  I put just the right amount of salt in to enhance the flavor of the whole shebang as well.

Sunday, June 19, 2011

Happy Father's Day! Black Bean Burgers & Peach and Berry Pie


This Father's Day, my parents, my fiance & I headed to my soon to be in-laws for a BBQ.  My favorite vegetarian barbeque recipe is my version of the black bean burgers from Tosca Reno's Eat Clean Diet Cookbook.  My tweaks include using one whole egg instead of two egg whites, kale instead of celery leaves and extra sunflower seeds instead of flax seeds.  I also leave out the curry powder, since I don't usually have that in the house.  The recipe is super easy - dump everything in a food processor, mix well and bake. They reheat exceptionally well in an oven or toaster.  Microwaving them might make them a bit soggy.

For dessert, I made a peach, blueberry and raspberry pie based on a peach & blueberry pie recipe in a cookbook we just refer to as "The Book."  "The Book" never fails to produce hit desserts.  It's actual title is Baking, by Martha Day.  The one catch is that all of the amounts are written in ounces, so you either need a kitchen scale or a desire to do a lot of math.  There are also websites that do conversions for you - just remember that there are different conversions for dry and liquid measures.

One different thing I did with this pie versus the previous pies was to make the crust in our brand spanking new 14-cup Cuisinart food processor.  Previously, I've made pie crust by hand using a pastry blender, as well as in our Kitchen-Aid mixer.  Having sampled multiple versions of my pie experiments, my family said the processor made the best crust, and I'd have to agree.  The blades help the butter incorporate much more evenly into the flour, and the ice water mixes in quite nicely as well.

Fresh fruit pies can be super juicy, so if you do make one from scratch, put a cookie sheet under it to help catch drips and spatters.  You also might consider wrapping the edges in foil or using a pie shield to prevent the edges from burning, especially if your pie takes more than a half an hour to bake.

Sunday, June 12, 2011

Chayote Squash - What Is It and What Will I Cook With It?


A month or so ago, I could have sworn I saw an article in Clean Eating or Vegetarian Times that made burritos with chayote squash.  I was determined to try it, but the chayote was elusive.  The local market?  Negatory - they don't go more exotic than a yellow bell pepper.  The Giant near our apartment?  Nada.  The Safeway by my yoga studio where I'd sworn I'd seen them dozens of times?  Not a single chayote in sight.  Ditto for two Whole Foods Markets and a Balduccis.  Just when I thought there was some sort of mysterious chayote shortage, some finally popped up at the local Giant and I snagged them right away.

Today, when I went to make said burrito dish, I realized I either hallucinated the recipe or misplaced the magazine.  So, I decided I'd work the chayote into a concoction.

Mind you, I had no idea how the chayote should be prepared or what it should taste like, so I turned to the trusty internet.  Per Wikipedia:


The Chayote in all it's glory.
The chayote (Sechium edule) . . . is an edible plant that belongs to the gourd family Cucurbitaceae along with melons, cucumbers and squash.  Chayote is native to Mesoamerica where it is a very important ingredient to the diet. Other warm regions around the globe have been successful in cultivating it as well. The main growing regions are Costa Rica and Veracruz, Mexico. Costa Rican chayotes are predominantly exported to the European Union whereas Veracruz is the main exporter of chayotes to the United States.

Interestingly enough, the chayotes I bought were from Costa Rica, so maybe there is something to this shortage thing . . . but I digress.

The chayote fruit is used in both raw and cooked forms. When cooked, chayote is usually handled like summer squash, it is generally lightly cooked to retain the crisp flavor. Raw chayote may be added to salads or salsas, and it is often marinated with lemon or lime juice. It can also be eaten straight, although the bland flavour makes this a dubious endeavor. Whether raw or cooked, chayote is a good source of amino acids and vitamin C.

I did taste a bite of the raw chayote and it was fairly bland, like a watered down apple.   So, I decided to put it in a cooked dish.

 We had half a red onion in the fridge, so I minced that up.  I diced one of the unpeeled chayotes (you get more out of one than you'd realize - there's no seeds or pit to scoop out) and stripped an ear of fresh corn.  At the same time, I also started up a pot of quinoa. 

In my big saute pan, I heated up some olive oil and sauteed the onions and corn, and then added the chayote and seasoned the mix with kosher salt and freshly ground pepper.   I bashed up four or so cloves of garlic and threw that in, along with about a teaspoon of cumin and juice from half a lemon.  I then took the whole thing off the heat and stirred in some fresh cilantro leaves.

To serve, I grabbed some mixed lettuce, and tossed 1/4 of the quinoa with about a cup of the bean and chayote mixture to put on top of it.  I reached for my faux cheese initially, but I decided it would be better without it.

The cooked chayote had a nice crunchy texture, and it picked up the flavors from the seasonings and the rest of the dish.  I anticipate eating the leftovers cold on a salad, or as a burrito filling, or even in an omelet.  I may also add some avocado to it once the two on my counter are at peak ripeness.

Sunday, May 29, 2011

I Love the Grocery Store

Hooray!  It's Rainier Cherry Season!
For me, going to the grocery store is like taking a six year old to Kay-Bee (well, when Kay-Bee actually was still in business).  I don't see grocery shopping as a chore, but, rather a place to discover new things and get myself a treat.

I tend to gravitate towards stores that put a lot of care into their produce sections, as well as offer whole grain breads, pastas and sides.  Also, stores that offer soy-free vegetarian products and packaged foods that don't have a ton of additives are a plus.

Thus I tend to spend a lot of my quality shopping time at the following places:

Empanadas, mango salsa and vegan crackers!
Grosvenor Market: This is located right next door to us, so bonus points for convenience.  They also have a decent produce section, a great prepared food and deli counter, lots of whole grain products and very helpful staff.  They carry Wild Harvest Organic and Culinary Circle products, both of which are high quality brands.  The downsides - due to its size, selection can be limited, especially when it comes to some of the specialty produce items I like to play with.  Also, they put their grape tomatoes on the wet rack, which is a no-no (never refrigerate whole tomatoes).

Balducci's: We have a Balducci's that's a mile away on foot or about five minutes in the car.  Since I'm vehicularly impaired (read: I don't like to drive), I enjoy walking down there.  Their produce section is incredible - a huge variety of lettuces, greens, and cut and whole fruit.  There are also hard to find tropicals (dragon fruit, mangosteen), as well as golden raspberries.  Their sandwich bar offers a variety of options, and they also have a nice selection of prepared foods, pastas and grains, spices and cheeses.  It's bigger than the Market, but some might consider it to be to small still (I don't personally).  The biggest downside for me is the price - think $9.99 for Cava Grill Crazy Feta Spread, $5.99 for those golden raspberries I love so much.  But, I think it's worth it for an occasional culinary indulgence and for hard to find items.

Whole Foods: We are fortunate to have multiple Whole Foods Markets' in our area, a number of which are metro accessible.  I alternate between the Friendship Heights store (metro accessible) and the brand new Rockville store, with an occasional stop at Dupont or the Kentlands.  Whole Foods carries a number of staples in my kitchen that I can't find elsewhere in my mostly pedestrian state - Westsoy seitan strips, Daiya cheese, Quorn products, Sunshine Burgers, Field Roast Grain Meat Company sausages, Earth Balance soy-free spreads, Vegenaise soy-free mayo, etc. Their produce department is also outstanding, and even bigger than the one at Balducci's.  The Rockville store also a has a neat area where you can buy spices in bulk, so if you only need a few spoonfuls of say, Zatar, you can get as much as you need.  You will pay a premium to shop there versus Safeway or Giant, but given the access to the vegetarian options, it's well worth it to me.

On that note, I did get a few treats last night at Balducci's that I wanted to share:

Rainier Cherries: Rainier Cherries are here!  They are yellow cherries with a blush of red.  I find them to have a lighter and more pleasant flavor than a Bing.  Also, they're super pretty to look at.


Panas Tamal EmapanadasPanas is an emapanadas shop on P Street in Dupont.  They are also available in the prepared foods section at Balducci's.  I tried the Tamal flavor, which has corn, onions, farmer cheese, scallions, and roasted jalapenos.  After five minutes in the toaster, they were ready to eat.  They have a nice kick and the ingredients were very fresh.

Mango Salsa: I'm a sucker for mango anything, so naturally, I couldn't resist Balducci's mango fruit salsa, which has fresh mango, pineapple, cantaloupe, onions and jalapenos.  It had a nice kick and paired well with Mary's Gone Crackers.

Friday, May 27, 2011

Yet Another Concoction

It was time to use up what was in the fridge yet again, so dinner was a concoction.  Tonight's experiment involved roasted brussel sprouts (30 minutes at 425 - make sure to coat them with olive oil and season with salt and pepper).  In a saute pan, I worked some shallots, sliced mushrooms and garlic in olive oil.  After that was done, I stirred in leftover wild rice, the brussel sprouts and some parmesan cheese.

Friday, April 22, 2011

Seder Cooking Part 1: Vegetable Kugel, Roasted Potatoes and Roasted Brussels Sprouts.

We started our Pesach cooking today.  With full disclosure, I did make some non-veg dishes for the guests, namely beef brisket and gefilte fish.  That said, there are plenty of veg sides that will make a delicious meal for me and my non-red meat eating mother.

The three veg dishes I made today were:
Veg cooking away!


Vegetable kugel.  This is one of my favorite Pesach dishes.  Most recipes call for frozen spinach, but I used fresh.  We also added onion, celery, carrots and yellow pepper (the recipe called for green pepper, but we thought yellow would make it prettier).   After letting the veg cook for 20 minutes in broth, we strained it and mixed in an egg & matzoh meal mixture.  It then baked in the oven at 350 for about 45 minutes.


Before baking.

The finished product.

Yummy browned potatoes!
We also made roasted potatoes, which were soaked in olive oil and onion soup mix, and then roasted in a 450 degree oven for about 50 minutes.
I also made my roasted Brussels sprouts with shallots.  Tomorrow, when we reheat them, I'll stir in some fresh parmesan.

Tonight, I will make the lemon "cream" filling for my cake, and tomorrow, it's the rest of the cake and Matzo ball soup!

Tuesday, April 19, 2011

Quinoa with Greens & Tomatoes and Golden Beets

Every year, at Passover, I make an attempt to be semi-observant.  I don't clean all the chametz out of my kitchen or switch the dishes, but I do try and give it a few days of good old Ashkenazi (aka, Eastern European ancestry) style Pesach eating - no leavened bread, no corn, no rice, no pasta and no beans.  When I was eating meat and fish, this was a no brainer.  Visualize a lot of salads with grilled chicken, broiled salmon with veggies, etc.

As a vegetarian, Passover becomes more complicated.  I want to get my protein, but my standards - beans, chickpeas, seitan, quorn - are verboten.  Given my activity level, I know I need some protein to keep me going.  So, in addition to eggs and nuts, I intend to eat a lot of quinoa.

For those unfamiliar with quinoa,  it is a "grain-like crop grown primarily for its edible seeds" and "elated to species such as beets, spinach, and tumbleweeds."  It's also considered by some, but not all, to be kosher for Passover.  But, I say if Mayim Bialyk, who is a much better Jew than I am, includes it in her "Passover Survival Tips for Vegans," I'm eating it.

Quinoa is super easy to make.  The ratio is one cup of quinoa to two cups of water.  You can make more, but I would not cut that down any further - I found this out the hard way when I burned 1/4 cup of quinoa in 1/2 cup water. But, quinoa keeps really well in the fridge, so it's a great item to make a lot of and use through out the week. To prepare, pour it all in a pot, bring it to a boil, then bring down to a simmer for 25 minutes or so or until all the water is absorbed, stirring occasionally.

You can put anything on top of quinoa and it's good.  Some people even have it for breakfast in lieu of oatmeal or hot cereal.  I chose to use what I had in the kitchen - onion, grape tomatoes, broccoli raab and some mixed bagged greens (chard, turnip and mustard greens).  I sauteed all of that up in olive oil and mixed it with the quinoa.

I also decided to roast the golden beets I picked up a few days ago.  If you like the taste of beets, but dislike dealing with the red ones, which stain, golden beets are a great option.  I peeled mine, sliced them about 1/4 thick, and mixed them with olive oil, fresh ground pepper and sea salt.  They roasted at 400 degrees for just over 30 minutes.  I sprinkled some goat cheese crumbles on them, as the two flavors compliment each other well.  But, if you prefer to make this dish vegan, you can omit that part.

Saturday, April 16, 2011

Real Simple Yellow Cake with Strawberry Filling and Vanilla Icing

The May issue of Real Simple has a neat article with multiple cakes, frostings, filings and toppings.  The recipes can be converted into sheet cakes, layer cakes and cupcakes, and allegedly there are over 256,000 potential cakes that can be made from this article.

I decided to go with the yellow cake, strawberry filling, vanilla icing and fresh strawberry topping, with the following changes:
  • I realized at the last minute we had no baking soda (oops), so I added more baking powder.
  • I accidentally liquefied the strawberries instead of just pulsing them (oops again), so I chopped up some additional fresh strawberries and added them to to the filling
  • I skipped the glazing of the topping (and you can make do with less than a quart - I had a lot leftover.  Fortunately, we like strawberries).
Here's some step by step documentation:

Cakes cooking on wire racks - I didn't drop them.  YAY.
The recipe said the cakes should take 22-25 minutes.  I felt mine needed to go a little longer in my oven.  Also, I was glad I took the time to butter the pans, add parchment, and butter again.  After the prescribed 15 minute cooling time in the pans, they slid right out onto the racks without breaking.


The filling that ate North Bethesda
 Next came the filling - thanks to my pureeing mishap, it was probably gooier than I intended.  Putting it in the refrigerator for 30 minutes before I frosted, like the recipe suggested, was a smart move.  Especially since the stuff kept falling on my feet.  I looked like something out of a George Romero movie.


VOILA - CAKE!

The finished product!  The gooey filling make my icing a little pink, but I think it's pretty (that's what I'm telling myself anyway) and the little strawberry bits offset the pact that there is a pound of confectioners sugar in the icing. 


A couple of baking tips I used here that I generally find helpful:
  • Get a mesh strainer if you don't have one - it's great for sifting flour and confectioners sugar.  I have one with two little hooks on it so you can rest it on a mixing bowl and pour your dry ingredients right into the strainer without jugging the whole shebang.
  • When cutting parchment paper to fit a round cakepan, make little snips around the side in the shape of the circle, take it off the pan, and connect the snips.  I felt like a genius when I did this today.
  • If you are going to make your own buttercream, have a good mixer.  I tried making buttercream a few years ago before I had the stand mixer and my hand mixer made horrible, gasping sounds.  It also helps when the butter is a room temp.
  • Speaking of room temp, yes, like the recipe says, eggs and butter should be at room temp when you bake.  It really does make a difference in how well everything comes together.

Thursday, April 14, 2011

Concoctions

As I was rushing to get out of work in time to get to yoga class, the fiance called me to let me know he'd be home late.  And then he asked "What are we having for dinner?"

Crap.

Yes, I love to cook ridiculously time consuming recipes.  But, sometimes I am:

A) Lazy
B) Facing a random assortment of things in the kitchen that seem to make absolutely no sense
C) Hungry enough to start gnawing on furniture

When this set of circumstances occurs, dinner is a Concoction.

Concoction is a term of my mother's - we can call her the Queen of the Concoction.  She can survey the fridge and the pantry, throw in whatever random things are available in no set amounts (aka "Enough"), cook it on the stovetop for no set time (aka "Until It's Done").  This, essentially is how I learned to cook, and also why my secret dream is for Chopped to have an amateur competition, because Mom and I would so take everyone down.  In fact, as I was sharing the blog with Mom, she said she liked it, but also asked "Are you just going to do recipes?" and I replied, "No, I promise to blog about Concoctions."

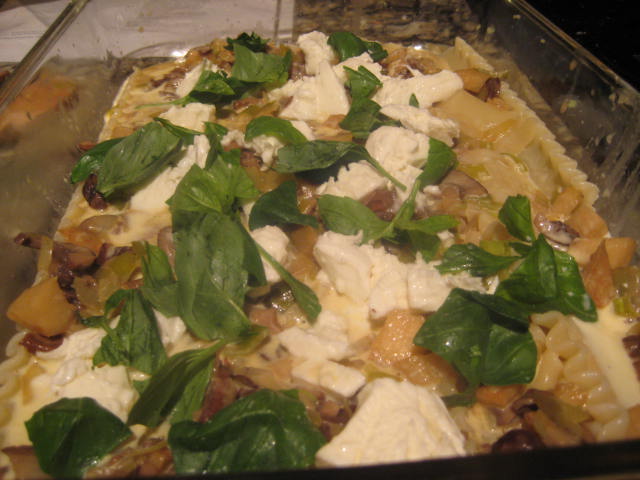
Behold the Concoction as it sautees and bubbles!
So, tonight, when I first walked in the door at 9:30, fiance was still at the gym and hunger was hardcore setting in, it was definitely Concoction time. 

First, I surveyed my options - we needed a grain, a protein and lots of veggies.  Since I love weirdo grains, we fortunately had a lot of options.  I decided to go with one with a shorter cooking time - pearled couscous.  Pearled couscous is also known as israeli couscous.  The grains are slightly larger and rounder than regular couscous.

As for protein, we had a ton of canned bean options.  I decided to go with chickpeas, since the couscous was taking us in a middle eastern direction anyway.

Next, I surveyed my produce options - leftover green onions from my veggie enchilada experiment, leftover celery root from the lasagna experiment, garlic cloves, mushroom slices and broccoli raab (okay - so I might have picked the last two items up at Safeway on the way home from yoga, but I didn't have to use them tonight).  In case you're not familiar with it, broccoli raab is a slender green vegetable.  And, as I learned tonight, it's not a form of broccoli.

After I chopped everything up, I heated olive oil in my large skillet and got the couscous going.  The onions went in first, followed by the mushrooms, fresh ground pepper, celery root, broccoli raab and chickpeas.  I added some leftover vegetable broth and let the whole thing cook down.  When the veggies were sauteed to my liking (maybe 12 minutes or so - I only know because that's how long the couscous took), I tossed in the couscous and shredded parmesan and, voila, Concoction in around 18 minutes.  And yes, it was tasty!
The finished product!

Ultimately, when you're pressed for time, you can eat a frozen meal, which is about as appetizing as a frozen brick and likely about as good for you, or you can make a Concoction.  So, if you are looking to make your own Concoction, here are some tips:

1.  Concoctions work well if you tend to have good stuff already in the fridge.  If the only stuff in your fridge is mustard, a leftover hot dog bun and bologna, you are not going to be happy with your Concoction.  So, start eating fresh produce, whole grains and beans if you're not already.

2.  Keep a well stocked pantry - As much as I eat fresh, there are a number of non-perishable items that aid any cook.  Canned beans keep well, and if you're leery of BPA, you can get ones that are BPA-Free.  Also, having a variety of quick cooking whole grains - quinoa, couscous, whole wheat pasta - will help you out.  If you really are in a crunch, I am also a fan of microwaveable pouches.  Seeds of Change makes a nice grain blend.  You should also have olive oil, an arsenal of spices and herbs (fresh is better in most cases, but dried works in a pinch . . . ha), and garlic cloves.  Cartons of vegetable broth are also a nice touch.

3.  Prep produce in advance - if your stuff is pre-washed and chopped, your Concoction will come together more quickly.  You can also have fresh-cut items on hand, like the sliced mushrooms I bought.  There are also fresh stir-fry mixes, shredded carrot and cabbage, chopped pepper mixes, bagged greens, etc. The faster you cook, the faster you eat.  And the more produce you eat, the healthier your meal is.

4.  Make Sure It's Pretty.  This is another edict of Mom's - "Food should be colorful."  As the saying goes, you eat with your eyes first.  The more of a variety of colors there are on your plate, the more appetizing the Concoction will be.  And, since fresh vegetables are the best way to put a lot of color in your meals, incorporating them in the Concoction will make your meal healthier.  So, you can do brown rice and mushrooms if you please, but I guarantee you'll be happier if you put in some carrots, yellow pepper and zucchini.  The trick is having all that stuff on hand in the first place, granted.

5.  Have something to put all this stuff in.  Having a lot of storage containers will facilitate both your prepped items, and leftover ingredients and additional servings of the Concoction for you to eat for lunch the next day.  We like these GlassLock containers.  They seal securely, which is important if you are bringing food to a potluck or bringing leftovers to work. 

I'll likely feature more Concoctions as the blog goes on, so stay tuned.

Monday, April 11, 2011

Everything's Better Roasted

Well, not everything.  That said, if there's a vegetable that you're either 1)sick of  or 2)never particularly a fan of, I suggest you roast it.

I am still hacking away at last night's lasagna, but I had some veggies in the fridge that needed to be cooked before they went to waste.

My first veggie - Brussels Sprouts.  Few words seem to strike fear into the hearts of children and adults than Brussels Sprouts.  But, these delicious little creatures have gotten a bad rap.  Chances are, if you've eaten them and disliked them, they were frozen and boiled to death.  But, roasted with olive oil and shallots and a touch of parmesan, they are quite tasty.

Anyway, what is a Brussels Sprout anyway?   According to wikipedia:

The Brussels sprout is a cultivar group of wild cabbage cultivated for its small, leafy green buds, which are typically 2.5–4 cm (0.98–1.6 in) in diameter and visually resemble miniature cabbages. The sprout is Brassica oleracea, in the "gemmifera" group of the family Brassicaceae. . . Brussels sprouts, as with broccoli and other brassicas, contains sulforaphane, a chemical believed to have potent anti-cancer properties. Although boiling reduces the level of the anti-cancer compounds, steaming, microwaving, and stir frying does not result in significant loss.


If you've never prepared a fresh Brussel sprout, it's easier than it sounds.  Get a good knife, and cut off the woody stem.  Discard any yellowed outer leaves.  I like to coarsely chop mine, mix them with olive oil, sea salt and freshly ground pepper, and roast them for 20-25 minutes at 425.  Halfway through the roasting time, I stir in some chopped shallots, and, with four or so minutes to go, I stir in some shredded parmesan/asiago blend.

Second veggie - the yukon gold potato.  Why is this potato different from all other potatoes, such as a russet, a red, etc.?  There's actually a whole page of potato cultivars if you'd like to learn more.  But yukons have a more golden flesh than a russet and, at least to me, are a bit fimer.  I like to roast them with (again) olive oil, freshly ground pepper, sea salt and fresh rosemary.  The roasting time is 30-35 minutes, depending on how small you cut the potatoes (try and get them all the same size for even roasting).

Now, the roasting treatment doesn't just apply to Brussel Sprouts and potatoes.  I also enjoy roasting butternut squash, carrots, zucchini, cauliflower, eggplant and beets.  What do you need to have handy if you're going to be roasting veggies?

1.  Olive oil.  Lots of olive oil.  We go through it so much that I should really buy stock in whoever owns Bertolli.  Olive oil helps seasonings cling to your veg, and helps you develop that nice brown crust that tastes so yummy.

2.  Sea Salt.  Sea salt or other coarse salts give your food a nicer texture than table salt. 

3.   Freshly Ground Pepper.  I like this from a textural standpoint as well.  I use a kind that has multiple types of peppercorns, which adds some interesting visual contrast.

Happy roasting!

Sunday, April 10, 2011

Sunday Blog 2 of 2: Celery Root & Mushroom Lasagna

I've been somewhat obsessed with celery root since the fiance and I took a trip to Montreal a few summers ago.  We had a celery root salad that I can still taste if I think hard enough about it.  I've been dying to play with it in the kitchen ever since, but I just now got around to it.
Celery root - it looks ugly, but is mighty tasty!
 I mused around for several recipes that sounded intriguing, and landed on this Celery Root & Mushroom Lasagna from Food & Wine magazine.  I've had it printed out for a month, and was determined to make it this weekend.
For those of you not familiar with Celery Root, our friends at Wikpedia share that:
Celeriac (Apium graveolens rapaceum) is also known as celery root, turnip-rooted celery[1] or knob celery. It is a kind of celery, grown as a root vegetable for its large and bulbous hypocotyl rather than for its stem and leaves. The swollen hypocotyl is typically used when it is about 10–12 cm in diameter; about the size of a large potato. Unlike other root vegetables, which store a large amount of starch, celery root is only about 5-6% starch by weight.  Celeriac may be used raw or cooked. It has a tough, furrowed, outer surface which is usually sliced off before use because it is too rough to peel. Celeriac has a celery flavour, and is often used as a flavouring in soups and stews; it can also be used on its own, usually mashed, or used in casseroles, gratins and baked dishes. It can be roasted like a potato, giving it a crispy edge.

After procuring the necessary ingredients, I fully intended to make this three hour (yes, you read that correctly - three hour) recipe right when I got home from the grocery store.  But, after a much needed long nap and getting Blog #1's pie in the oven, I got a bit of a late start - around 8:00 p.m.

I love the fact that this recipe is so veggie heavy.  Pounds of mushrooms, leeks, celery root and shallots!  And, it was easy to make veg - I eliminated the prosciutto and used a vegetable broth (Pacific Natural Foods) in lieu of the chicken broth.   Also, a tip: rather than buying individual packages of herbs, you can just get a Poultry Blend, which will have just enough of the sage, rosemary and thyme (yes, I now have "Scarborough Fair" in my head).

Clockwise from bottom right: cremini mushrooms, leeks, celery root and soaked porcini mushrooms.
Now granted, despite all the produce.  healthy is not exactly how I'd describe it . . . we're talking pounds of cheese, lots of heavy cream.  But, have you ever tried to peel and chop a celery root?  It's like hacking through lumber.  I was literally sweating.   The chopping alone took about 20 minutes, so, if you find chopping tedious, this is not the recipe for you.

The aforementioned ragu.
However, if you're willing to put up with all the hacking, this recipe is tremendously rewarding.  The smell of the vegetable ragu was intoxicating - shallots and mushrooms and leeks and celery root in olive oil and butter, along with a bundle of fresh herbs . . . it was all I could do not to just eat it all while it was cooking.  It would make a terrific pasta sauce. 

After the ragu and cream sauce were done, and the lasgana noodles were boiled, the assembly began.  

The recipe called for fresh basil and fresh mozzarella, in addition to the ragu and cream sauce.


And here it is, after an hour in the oven.  It's 11:07 p.m. and I'm eating my first piece and wow, was it worth the wait!


Sunday Blog 1 of 2: Sophie's Caramel Apple Pie

It's been a busy culinary Sunday, so there will be two blogs today.

Blog #1 is baking related.  Technically it's vegetarian, and it does have fresh produce, so I feel ok sneaking it in here . . . Anyhow, I had a contest at work where I promised the winner a homemade fruit pie.  Sophie was the winner, and her flavor of choice was caramel apple.

So, I set upon making this recipe from The Washington Post.  I had made it a few years ago for my fiance's grandmother's birthday, so I knew it was tasty.

 I used Macintosh apples, even though the recipe calls for Granny smith.  Why?  Because my mother's edict is that Macintosh is always the #1 choice for baking, and Mom does know best.  The caramels are Kraft. 

For the crust, I used my Kitchen-Aid.  I made the crust last night to save time tonight (more on that later - meaning it's 10:00 p.m. and the subject of blog #2 is bubbling in the oven with 30 minutes to go and it still needs to rest 20 minutes after that  . . . a long night it shall be).


I made the topping with a pastry blender.  If you bake a lot, it's a handy dandy tool.  You can also use two knives if you prefer to do that.

I skipped doing the cutouts on the top.  I rarely roll out my pie crust thin enough (I need to work on that) to get my crust over the edge of the pie pan, much less for the extra cutouts called for here.


After an hour bubbling in the oven, here's the end result:


To the office it will go tomorrow!  Sophie, I hope you enjoy!!!

Tuesday, April 5, 2011

Vegetarian Cheesesteak - Brought to You By My Friend Seitan

My co-workers were asking me about a vegetarian diet today, specifically how I get protein.  It's a common question when you tell people you're a vegetarian, I suppose. 

Now, I'd venture to guess that most people's first suggestion about protein for a vegetarian would be tofu.  One challenge I have is that I've got a soy allergy.  It's nothing life threatening, but I do get violently ill if I have too much of it.  So, that puts tofu and a number of "fake meats" out of the picture.

That said, I really don't feel protein deprived - I eat all kinds of beans, lentils and nuts (with the exception of walnuts and hazelnuts, which make me even more violently ill than soy).  Quinoa, farro, bulgur and wheatberries are also good sources of protein.  I still eat the occasional egg and dairy product.  And, I'm a big fan of Quorn - both in the grounds and tenders styles.   (I will share a post on the glories of Quorn sometime soon - the stuff is really amazing).

But, my #1 favorite vegetarian protein source is seitan.  With a single serving having around 25 grams of protein, it's a great way to work more protein into your diet if you're concerned you're not getting enough.  I avoided seitan for awhile, because I assumed that it was soy based.  In actuality, seitan is a form of wheat gluten.  From our friends at Wikipedia:

Wheat gluten, also called seitan (pronounced /ˈseɪtæn/), wheat meat, Mock Duck, gluten meat, or simply gluten, is a food made from the gluten of wheat. It is made by washing wheat flour dough with water until all the starch dissolves, leaving insoluble gluten as an elastic mass which is then cooked before being eaten.  Wheat gluten is an alternative to soybean-based meat substitutes such as tofu. Some types of wheat gluten have a chewy and/or stringy texture more like that of meat than most other substitutes. Wheat gluten is often used instead of meat in Asian, vegetarian, Buddhist, and macrobiotic cuisines. Simulated duck is a common use for wheat gluten.

I will note that Seitan is more challenging to find in a traditional grocery store than tofu and "fake meat."  In all the grocery stores I frequent in the DC area (and man, do I hit them all - I love the grocery store!), the only place I can ever find it is Whole Foods.  That said, it does have a decent shelf life, so I will often stock up on several packages at a time when we go there.

The brand I buy is WestSoy.  I prefer the strips to the cubed version.  You can sub it anywhere you'd use strips of meat - stir-frys, etc.  But, my #1 favorite way to use Seitan is in my Vegetarian Cheesesteak.


The Vegetarian Cheesesteak came to be last Fall.  At that point, I had been "off meat" since May.  And then football season started.  As a native Philadelphian and a die-hard Eagles fan, I ate my share of Whiz Wit in my day.  And, lo, when I was looking for something to eat during MNF (that's Monday Night Football for those of you not as football obsessed as me) I missed my cheesesteaks, but not enough to go back to actually eating beef.

Enter Seitan!  When you run a knife through it roughly, it resembles cheesesteak meat.  To make the sandwich above, I saute onions in olive oil until they are golden, then add the seitan.


Once the seitan is nicely browned, I season it with red pepper flakes and add sliced peppers (I used the leftover roasted yellow peppers from Sunday's enchiladas), spinach and cheese.  I use Daiya when I want a vegan version, but since we're out of both Daiya (need to make another run to Whole Foods, as I've also cleared out all my seitan), I used what we had in the house, which was some rennet free Cabot Monterey Jack cheese (Provolone is also great on this, and more traditional, but the other eater in my house may have eaten all my provolone . . .).   I serve the whole thing on a whole wheat sub roll carried by my local market.

The result is a satisfaction of my craving for a cheesesteak without that feeling of having swallowed a bag of lead.

Good sides for this bad boy are oven roasted potato fries (425 or 450, yukon golds cut into wedges, seasoned with salt and pepper, bake until browned) or sweet potato fries (I'm particularly fond of using Hannahs.)  Tonight, since I got home on the late side from yoga and it takes our oven about 37 years to heat up, I had a side of fresh fruit - blueberries and golden raspberries.

Sunday, April 3, 2011

Vegetable Enchiladas

My soon to be in-laws were joining us for lunch today, so I decided it was time for a treat: vegetarian enchiladas.

When I attempt something new, I futz around on the internet until I find a recipe that looks interesting, and then I play with it a bit.   I decided to start with this Food Network Recipe, which was from Rachel Ray's $40 a Day show.  Rather than use pre-made green chile sauce, I decided to make my own green salsa recipe using Simply Recipe's Tomatillo Salsa Verde.  And, we decided we needed some "yellow rice" on the side, so I found this recipe from TammysRecipes.com.

How Do You Raja a Pepper?
Cooking 101: Read your recipe and read it again.  So, before I started cooking, I read the at the enchilada prep and it said to prepare the peppers "raja style."  Frankly, I had no clue what this meant.  Google was my friend again here - I found this helpful article that told me to roast them, sweat them, and cut them up.  Ah, easy enough.  Even though the recipe said only to roast the poblanos, I thought it would be nice to also roast our friends the bell peppers, which I thought would add a nice flavor element to the dish.

Behold, the beautiful poblanos and bell peppers before I stuck them under the broiler:


I won't lie - I am lousy at timing things.  My mother's adage about how long things should be cooked?  "Until it's done."  Hence I never got in the habit of looking at a clock.  But I can tell you I rotated them with tongs until each side was nice and charred.  I could have probably let them go longer, but I am impatient.


So, What is a Tomatillo?
If you've gone to Chipotle, or eaten salsa verde, you've had a tomatillo.  But, since I promised my future father-in-law I'd look it up, here it is, per Wikipedia:

The tomatillo (Physalis philadelphica) is a plant of the tomato family, related to the cape gooseberry, bearing small, spherical and green or green-purple fruit of the same name. Tomatillos, referred to as green tomato (Spanish: tomate verde) in Mexico, are a staple in Mexican cuisine.


The salsa recipe gave the option of roasting or boiling them, and I decided to roast for enhanced flavor.  I also cut it down to one serrano - it was fine and had plenty of kick.  I also left out the sugar - I'm trying to use as little refined sugar as possible when I cook (baking is another story :) ) and I didn't see the need for it.

Finished Product and My Vegetarian Tweaks


  I made the following additional switches & subs:
  • For the enchiladas themselves, I swapped out mushrooms for black beans - we wanted the added protein and the color oomph.
  • Also, I was going to use yukon potatoes per the original recipe, but, frankly, I got lazy and decided not to bother.  It was fine without them.  I (meaning Balducci's) also didn't have the hoja santa or espazote.
  • For the rice, I used olive oil in lieu of butter, and vegetable broth in lieu of chicken broth.  We also used brown rice.  The tumeric got it nice and yellow - you honestly wouldn't know the difference.
I did use Monterey Jack cheese, but, if you wanted to go vegan, you could use a soy cheese or Daiya.  Personally, I'd recommend the Daiya - it does melt well and tastes more like cheese.

 Everyone had two servings, so I am considering this a success!