Showing posts with label apples. Show all posts

Thursday, September 29, 2011

Vegetarian Rosh Hashanah Part I: Jewish Apple Cake

Wow - it's been awhile since my last blog . . . lots of travel and work stuff, so I haven't been doing a lot of cooking or had time in front of a computer.  However, Rosh Hashanah gives me a welcome return to my kitchen and blogging.

For those of you unfamiliar with the Jewish High Holidays, Rosh Hashanah is the start of the Jewish New Year.  In my family, we attended synagogue and then prepared a festive holiday meal.  This year, we'll be hosting my husband's family and I'll be preparing a fully vegetarian dinner. 

Since I'm making multiple dishes, I started cooking right after I got home from shul.  My family always incorporates apples and honey into Rosh Hashanah dinners, a tradition that dates back to medieval times.  Apples and honey symbolize the hope a sweet new year. 

In addition to serving apples and honey before the festival meal, I also like to serve an apple based dessert.  For the past several years, I've made a scratch apple cake.  I use this AllRecipes.com recipe, which calls for apples, orange juice and vanilla.  The recipe calls for using a tube pan, but I use a bundt pan and it always turns out fine.  The recipe has a cooking window of 75 - 90 minutes, but I find I need the full time, if not more.

Enjoying apple picking at Butler's Orchard
It's made with oil, rather than butter, so if you aren't veg, but keep kosher, you can include it in a meat meal.  However, it does contain eggs.  Vegans, I may eventually attempt it with an egg replacement to make it vegan versus lacto-ovo. 

For the apples, I used three apples from the 20 (yes, 20!) pounds of apples we picked at Butler's Orchard last weekend.  The variety I used is called a Jonathan, which is described as "spicy and fragrant, juicy, sweet-tart."   Look for a more apple experiments in future blogs!

Sunday, April 24, 2011

Seder Cooking Part 2: Matzo Ball Soup and Apple Kugel

After Friday's epic day of cooking, we only had to make a few things on Saturday: matzo ball soup, apple kugel and the second edition of the layer cake.


My family has always  made our Matzo Balls from scratch.  My grandmother and great grandmother both had recipes.  My grandmother's recipe called for Nyafat, which, to my mother's and my great consternation, was discontinued a few years ago. When we tried to sub oil, we got more matzo chunks than matzo balls.  So, we switched to my great grandmother's recipe, which calls for oil.

Making matzo balls can be a time consuming process, but I love it.  I have fond memories of my grandmother walking up to our front door in a little black hat, while my grandfather followed behind with jars of home made chicken soup.   My grandmother, mother and I would always make the matzo balls together, so I've had about 20+ years of practice at this point.

The "rules" ok making the matzo balls are as follows:
  •   When doubling the batch, make each batch in a separate bowl.  No one knows why this is.
  •   The mixture must chill in the fridge for at least 1 hour
  •   When forming the mazto balls, you must barely touch them lest they become the dreaded "hockey pucks."
  •   Any recipe of my great-grandmother's that says parsley is "optional" really means that parsley is mandatory.  We added in some chopped fresh stuff, since we had it handy for the seder anyway.
  So, here is the step by step process of the making of the family Matzo Balls:

You can see here the two bowls for the two batches.  I can get about 13 matzo balls from each batch, which was perfect for our 11 seder guests, plus leftovers.  While some people do put seltzer in their Matzo balls, it's a McGuffin here.  It just happened to be on our counter.  You don't want to make your Matzo balls too big, as they will swell mightily when cooking.  Mine are a heaping dinner spoon full.
Fill a LARGE (I'm serious here - it should be huge) stockpot with water.  We use my grandmother's stockpot for this purpose.  Once your water is at a rolling boil, lower in your Matzo balls.   The best tool to have on hand for this is a flat skimmer with a sturdy handle.  It doesn't have to be expensive.  My skimmer was $2 at Ikea.


When you first lower your Matzo balls into the water, they'll sink to the bottom.  When they rise to the top, lower the heat and cover.  Cook for thirty minutes.  The water should be barely bubbling - if the boil is too heavy, your Matzo balls will break.  After 30 minutes, remove the Matzo balls with the skimmer.  When your soup is ready, reheat them in the soup.  I used a combination of low salt Pacific Organic vegetable broth and the leftover broth from when we made the veg mixture for the vegetable kugel.


One note - have lots of salt on hand.  I like my Matzo balls to be very salty, and even with the salt in the recipe, there wasn't enough salt for my taste, especially since we used low sodium veg broth.


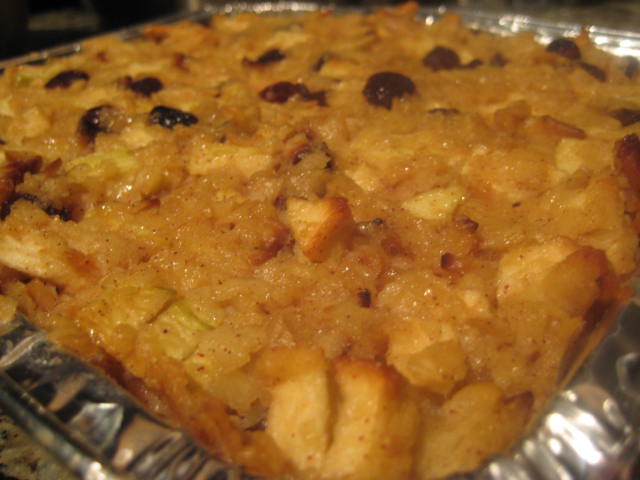
The other thing we knocked out was the apple kugel.  You can see the recipe on the Maneschewitz website.  We did not include walnuts, and we soaked the raisins prior to cooking, per my mother's suggestion, so that they would not sink to the bottom of the kugel.  I'd make this even for non-passover meals - it's a pretty tasty side dish.

Sunday, April 10, 2011

Sunday Blog 1 of 2: Sophie's Caramel Apple Pie

It's been a busy culinary Sunday, so there will be two blogs today.

Blog #1 is baking related.  Technically it's vegetarian, and it does have fresh produce, so I feel ok sneaking it in here . . . Anyhow, I had a contest at work where I promised the winner a homemade fruit pie.  Sophie was the winner, and her flavor of choice was caramel apple.

So, I set upon making this recipe from The Washington Post.  I had made it a few years ago for my fiance's grandmother's birthday, so I knew it was tasty.

 I used Macintosh apples, even though the recipe calls for Granny smith.  Why?  Because my mother's edict is that Macintosh is always the #1 choice for baking, and Mom does know best.  The caramels are Kraft. 

For the crust, I used my Kitchen-Aid.  I made the crust last night to save time tonight (more on that later - meaning it's 10:00 p.m. and the subject of blog #2 is bubbling in the oven with 30 minutes to go and it still needs to rest 20 minutes after that  . . . a long night it shall be).


I made the topping with a pastry blender.  If you bake a lot, it's a handy dandy tool.  You can also use two knives if you prefer to do that.

I skipped doing the cutouts on the top.  I rarely roll out my pie crust thin enough (I need to work on that) to get my crust over the edge of the pie pan, much less for the extra cutouts called for here.


After an hour bubbling in the oven, here's the end result:


To the office it will go tomorrow!  Sophie, I hope you enjoy!!!